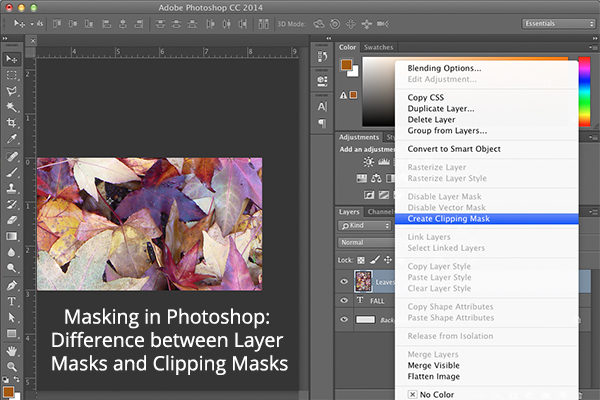
Masking is one of the most powerful in adobe photoshop. Masks can be used to create very useful visual effects. From combining images to stylizing texts, there are numbers of uses of masks in Photoshop. Here we will learn about the two types of masks which is used in Adobe Photoshop: layer masks and clipping masks through examples. Both should be useful in a different way and if you want to master Adobe Photoshop, then you will need to understand these crucial differences.
Difference Between Layer Masks and Clipping Masks
Adobe Photoshop: Layer Masks
Layer masks are one of Adobe Photoshop’s most useful features. The path to Photoshop software mastery begins with grasping the power of layer masks.
Basically, a layer mask controls a layer’s transparency.
Layer masks use a single mask that is applied to a single image and that allows to hide portions of a layer while exposing other layers positioned underneath. This is performed by adjusting the layer’s transparency and opacity through a mask.
It can only have monochromatic colors in grayscale between white, black and the various shades of grey in between.
Click on below Video: Difference Between Layer Masks & Clipping Masks in Photoshop
How to Create a Layer Mask
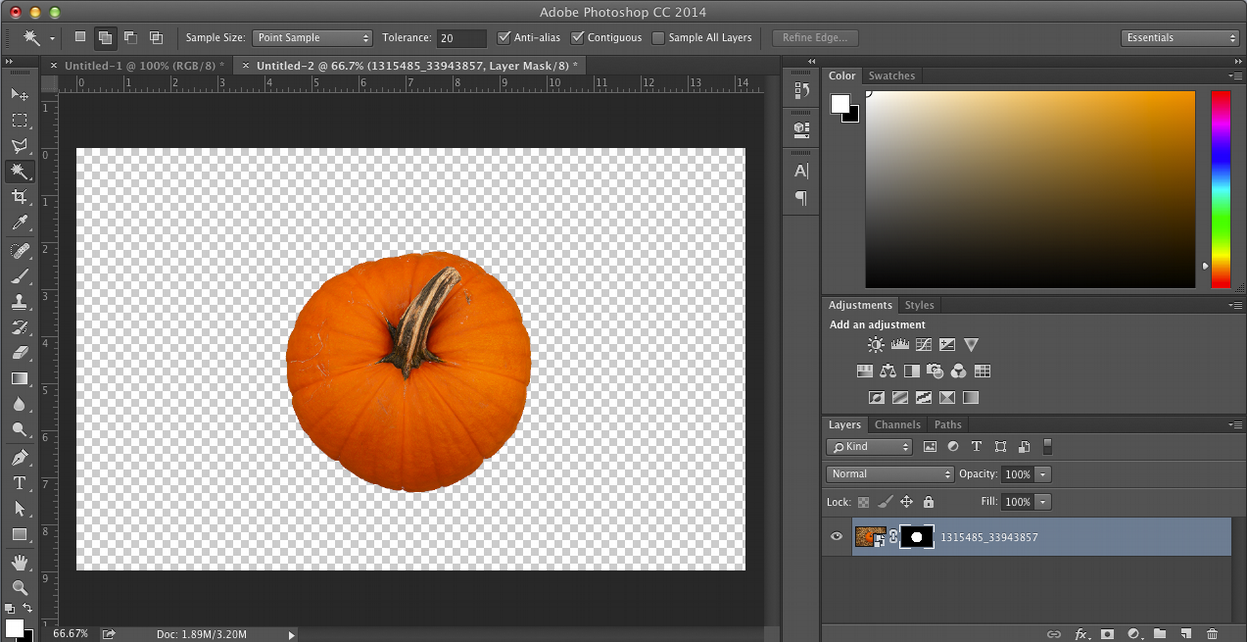
Open Photoshop software and start by selecting the image you wish to manipulate. There is a number of tools to select the object you want to mask. In this example, here we make use of the magic wand tool to select the pumpkin object, but you can also make use of the marquee tool, quick selection tool or a shape tool.
Once the selection process is active, click on the mask button to create a new mask layer. The selected pixels set to visible while the unselected are hidden. If you look at the layer palette, you will mark that the mask is being applied to the layer itself.
Now that you have the layer mask, you can choose to add it to a totally different background.
Adobe Photoshop: Clipping Masks
Clipping masks allow you to hide portions of an image, but these masks are created using multiple layers, whereas layer masks only make use of a single layer. A clipping mask is a shape that masks other artwork and only reveals what lies in shape. Not only clipping masks be created from shapes, but they can also be applied to vector and text objects.
This mask work in the same way as layer masks, except that they don’t have the monochromatic grayscale color range. Instead, they acquire the transparency of the layer beneath them.
Click on below Video: How to use Layer Masks in Photoshop
How to Create a Clipping Mask
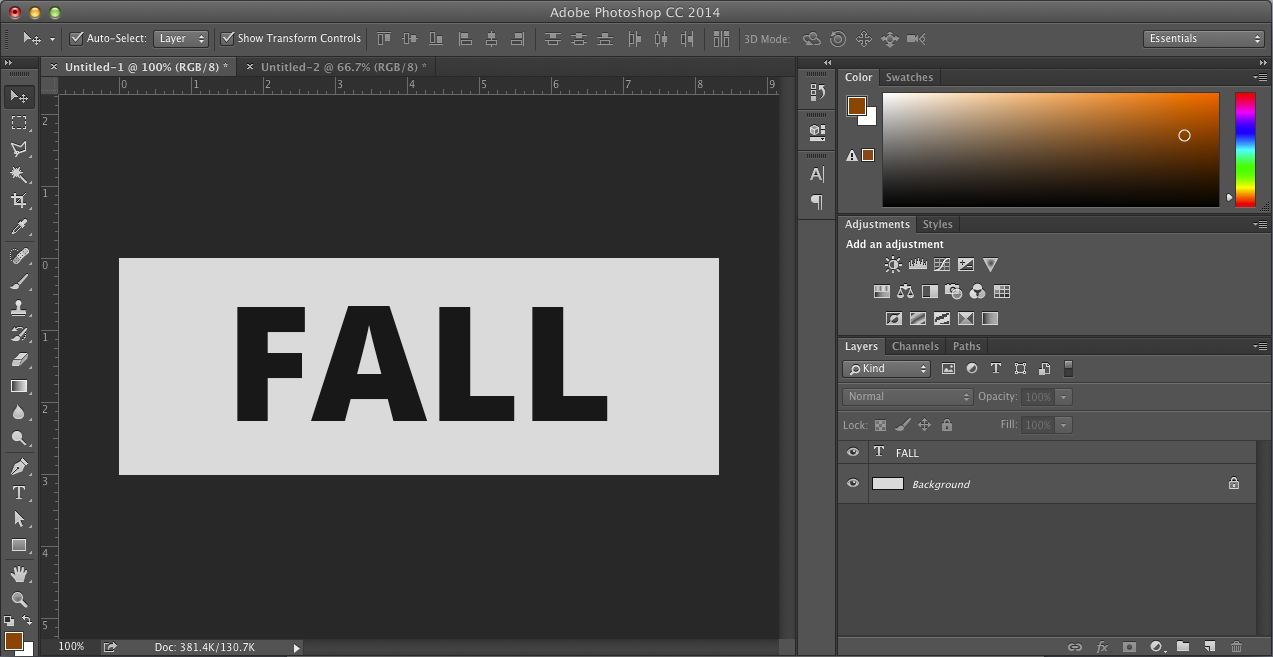
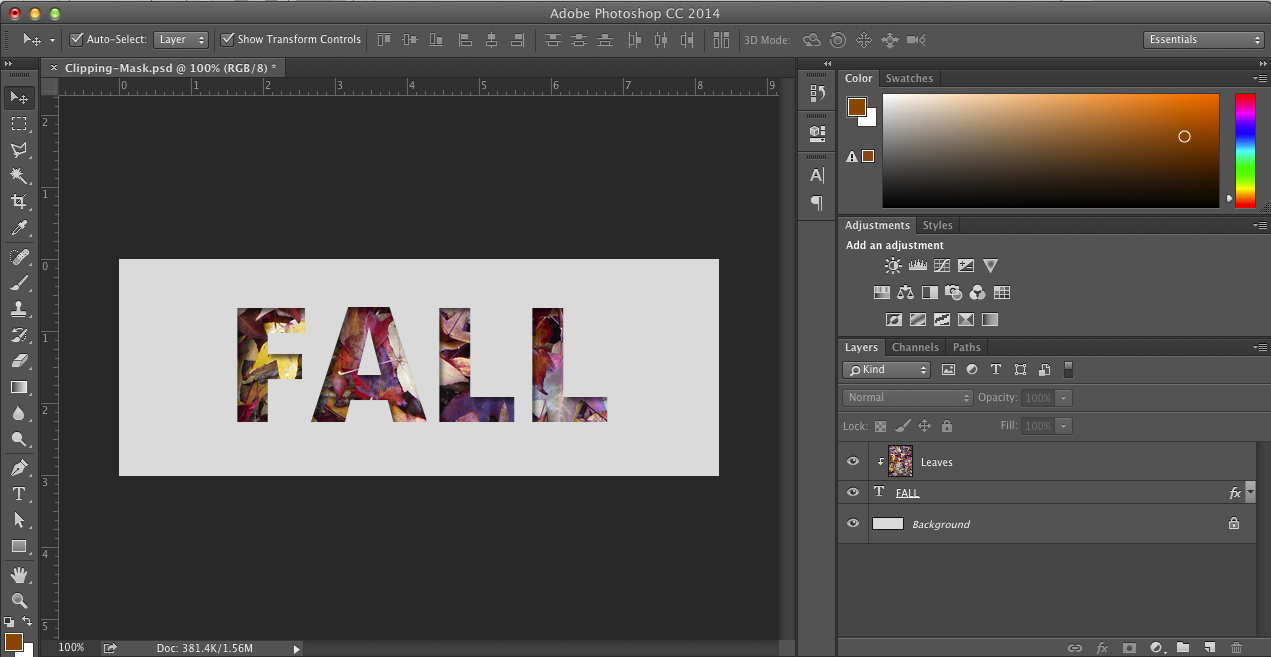
To create a clipping mask using text, start by typing out the text you want to mask in Adobe Photoshop.
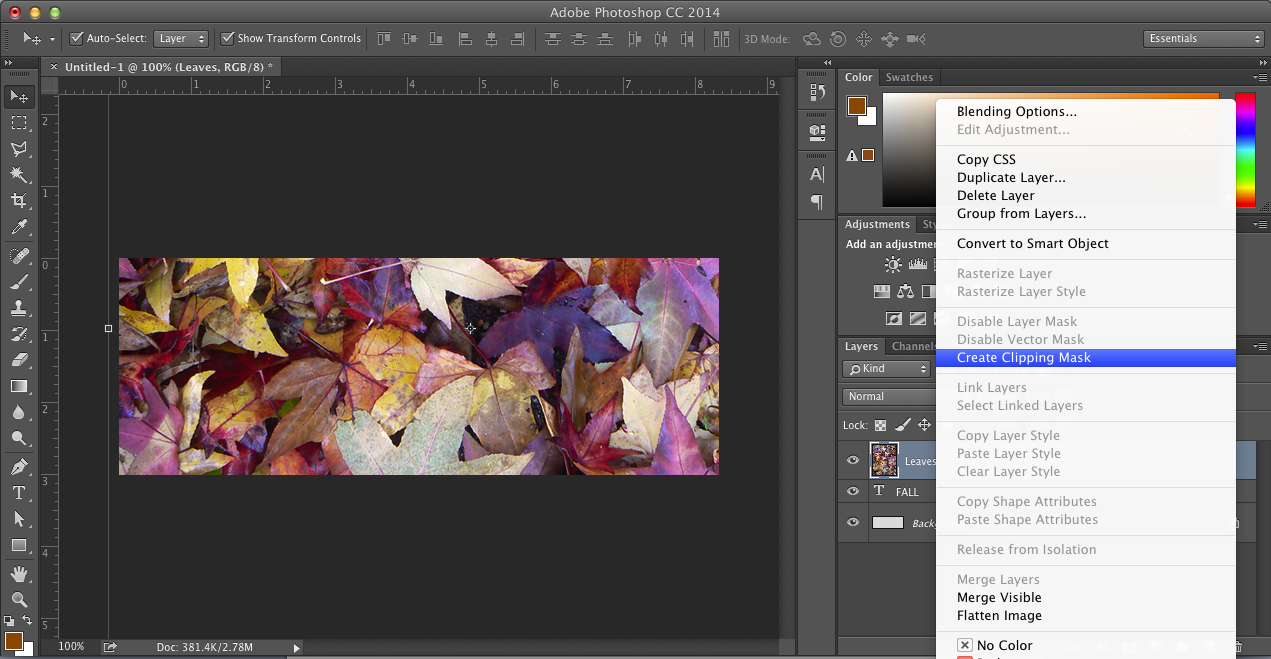
Next, add the image you wish to mask above the text layer. Right click on the image layer and select create a clipping mask.
Now you should see your image displaying through the letters you created. If you look at layers palette, you will see the mask was created by connecting two layers.
There are many uses of this wonderful masking feature. You can learn more about layer masks and clipping masks in Animation courses.
Stylizing text and blending images are just a few examples of how you can enhance your designs with Adobe Photoshop masks.
For students who are interested to learn more on Step to Learn the Magic Wand Tool in Photoshop and would like to learn this on a more professional level, please sign up today for our Arena Sayajigunj Course.
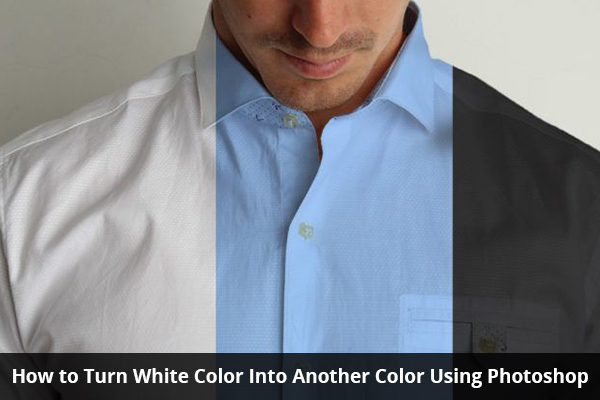
Changing the color of an object in your image using Photoshop is fairly easy. However, if an object you like to change is white, it may be challenging to give it a new color in a realistic fashion. But there is a way to do it and do it quickly. Here, we will teach you step-by-step to turn white color into another color and make it look more natural using Photoshop software tools.
Simple Steps to Turn White into Any Color in Photoshop
Step 1
Open your image which you want to change color in adobe photoshop and make a selection of the white area using any method you like and refine the layer mask later.
Step 2
Once you are done making the selection of the white area, create a solid color adjustment layer and pick any bright color you like. After that, you need to change the blending mode to multiply, to get a decent effect. Sometimes, this may be the only thing you need to do and other times you will need some more adjustments to get a more natural and realistic result.
Click on below Video: HOW TO CHANGE WHITE COLOR INTO ANY COLOR IN PHOTOSHOP| PHOTOSHOP TUTORIAL
Step 3
In this step, you can also add a Curves adjustment layer and adjust the contrast. You only need to apply Curves to the selection. The simplest way to do it is to group the Solid Color and the Curves adjustment layer mutually and apply the mask to the group. This way, any changes you make will only be applied to the white area.
This above three steps will be the same, but the final result may look a bit flat when you work with dark colors. So, it’s time to add some highlights.
Step 4
Add one more curves adjustment layer on top of the one which you created previously. Click in the center area and drag the point up to make the image brighter.
Step 5
Open the layer style box of the new curves adjustment layer. Under the blend if, go to the underlying layer slider and drag the black point to the right. This limits the highlights but gives very harsh transitions. Hold the Alt/Option key and split the slider for smoother transitions. This makes the black area a bit “shiny” and adds depth to the image. You can repeat this once more if you are not satisfied with the result.
Click on below video: Turn White into Any Color in Photoshop
For students who are interested to learn more on Adobe Photoshop in Vadodara and would like to learn this on a more professional level, please sign up today for our Animation Course at Arena Sayajigunj to get the best start to their Professional Careers.
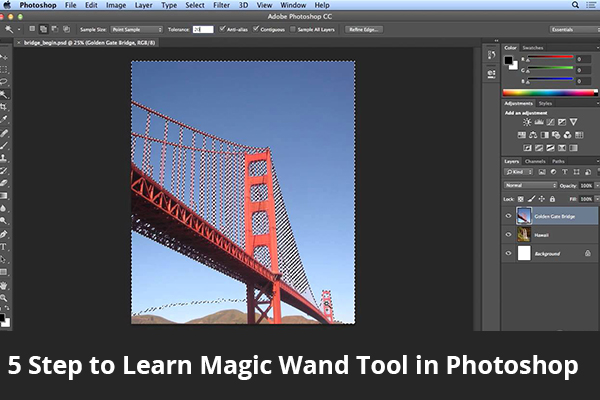
The Magic Wand Tool is simply known as the Magic Wand, is one of the oldest selection tools in Adobe Photoshop. It is a quick way to select and mask the certain portions of an image, giving you the ability to change one part of your image while leaving other parts intact.
One of the most common uses of the magic wand tool is to swap out or remove the background of a product image, leaving the subject of the image in place.
The Magic Wand automatically selects an area of image based on its color and tone. Click on any pixel, the magic wand find others that it detects a match. Using the Magic Wand options bar, you can able to choose to select only those pixels that share a common border or attempt to allow Photoshop to find all pixels within the image.
Photoshop really does a great work of finding matching shades within an image. This is helpful anytime you need to change a specific color throughout your project. What makes the Magic Wand feature even more useful that you can tweak the tolerance. If you have a shade of blue that is a close match for a shade of grey, for example, giving Photoshop the directive to have a more precise threshold makes the Magic Wand even more useful.
In this Arena Sayajigunj blog post, we are going to look beyond the magic, below are the few steps to learn how the wand tool really works in Magic Wand Tool in Photoshop
Click on below Video: How to Use the Magic Wand Tool in Photoshop
5 Steps to Learn the Magic Wand Tool in Photoshop
Step 1: Start with the Magic Wand Tool
This tool is used to select a similarly colored area.
Select the Magic Wand tool by clicking on its icon in Adobe Photoshop’s tool panels.
The tool works by you clicking in the area that you want to select.
Example: To select a black rectangle, we click in the middle of the black part of the shape.
Step 2 Adjust the Tolerance Level
Adjust the tolerance level which you find in the options bar on top of the screen.
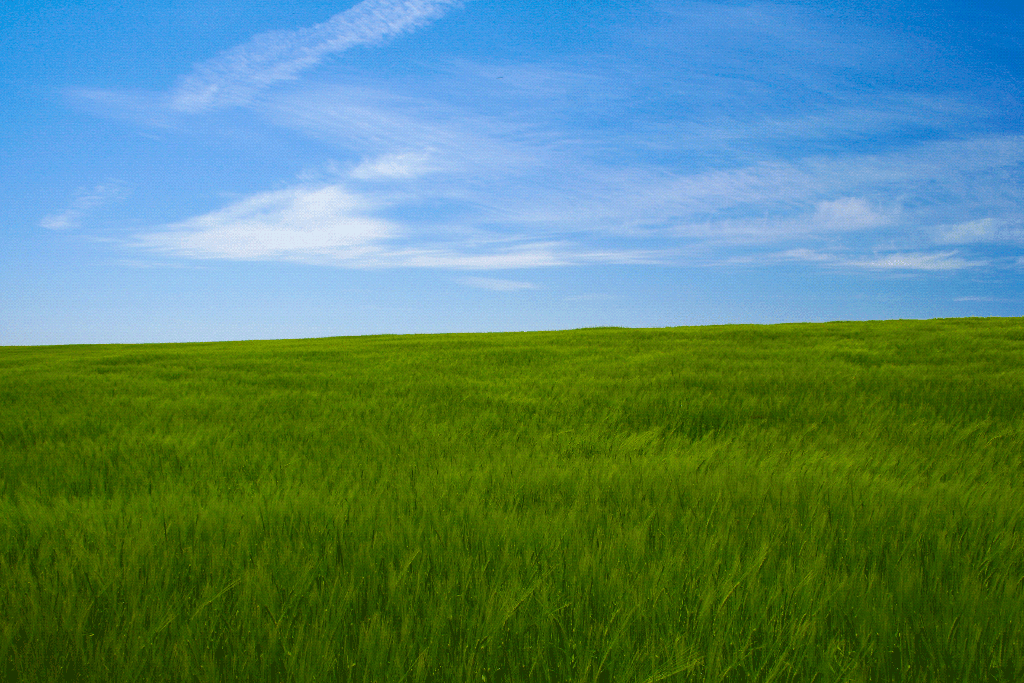
Open the image in Adobe Photoshop. The photo looks beautiful, but here the sky could view even more impressive. So, you can replace it.
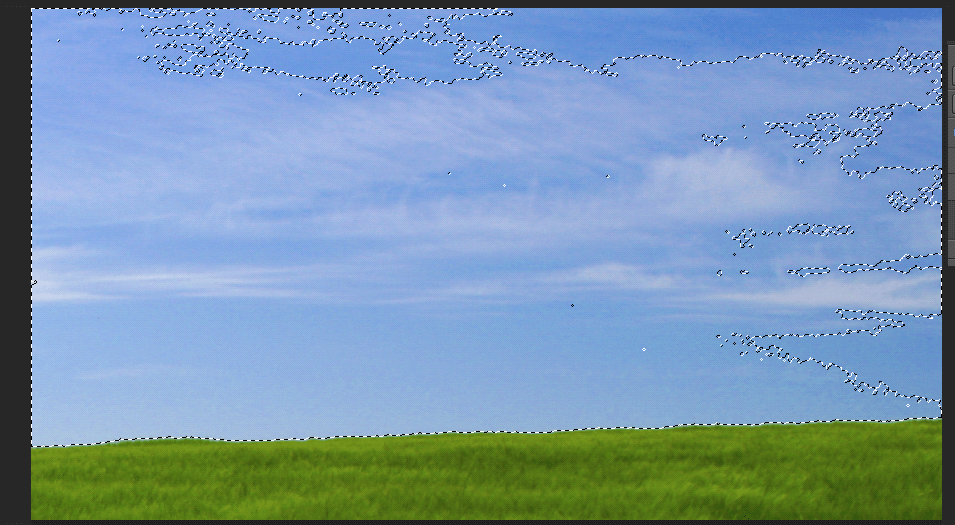
Step 3: Select the Area that you want to Remove
Replacing the sky means you first need to select an area that you want to replace. The magic wand excels at selecting large areas of solid color and the sky is blue with only a slight variation in tone. The magic wand will make it easy to select.
Click on below Video: Using the Magic Wand Tool – Adobe Photoshop CS6 Tutorial
To replace the sky, you need to press ctrl+J to copy the area you want to keep in a new layer.
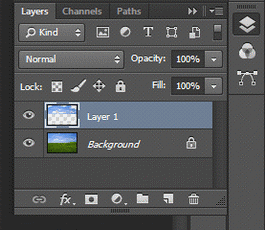
Step 4: Open an Image to Replace the Selection
Open the image that you want to replace the original sky with. Press ctrl+A to select the whole image and then press ctrl+C to copy it on the clipboard.
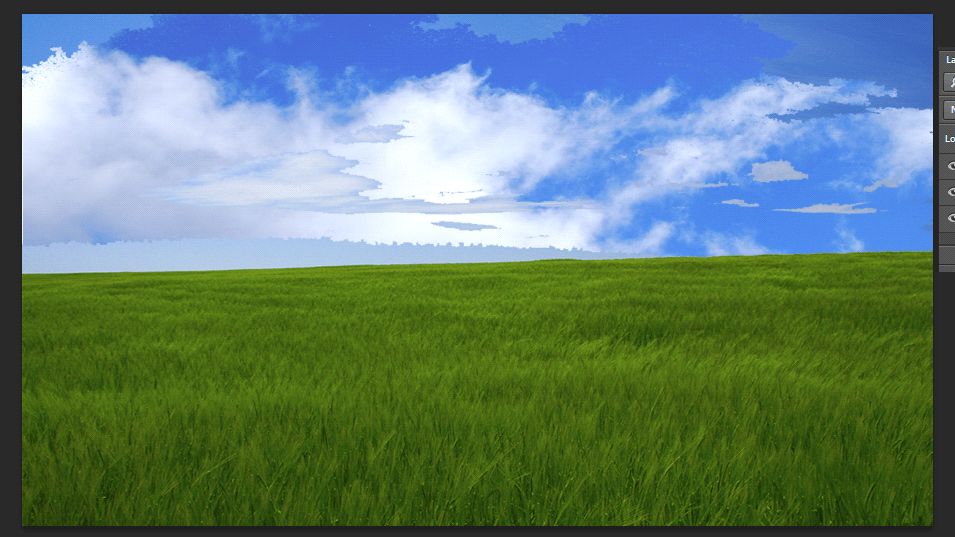
Step 5: Replace with the New Selection
Finally, press ctrl+V to paste the new image onto the document.
The sky is successfully, quickly and easily replaced.
We hope you find this blog very helpful while working with the Magic wand tool in Adobe Photoshop.
For students who are interested to learn more on Step to Learn the Magic Wand Tool in Photoshop and would like to learn this on a more professional level, please sign up today for our Arena Sayajigunj Course.
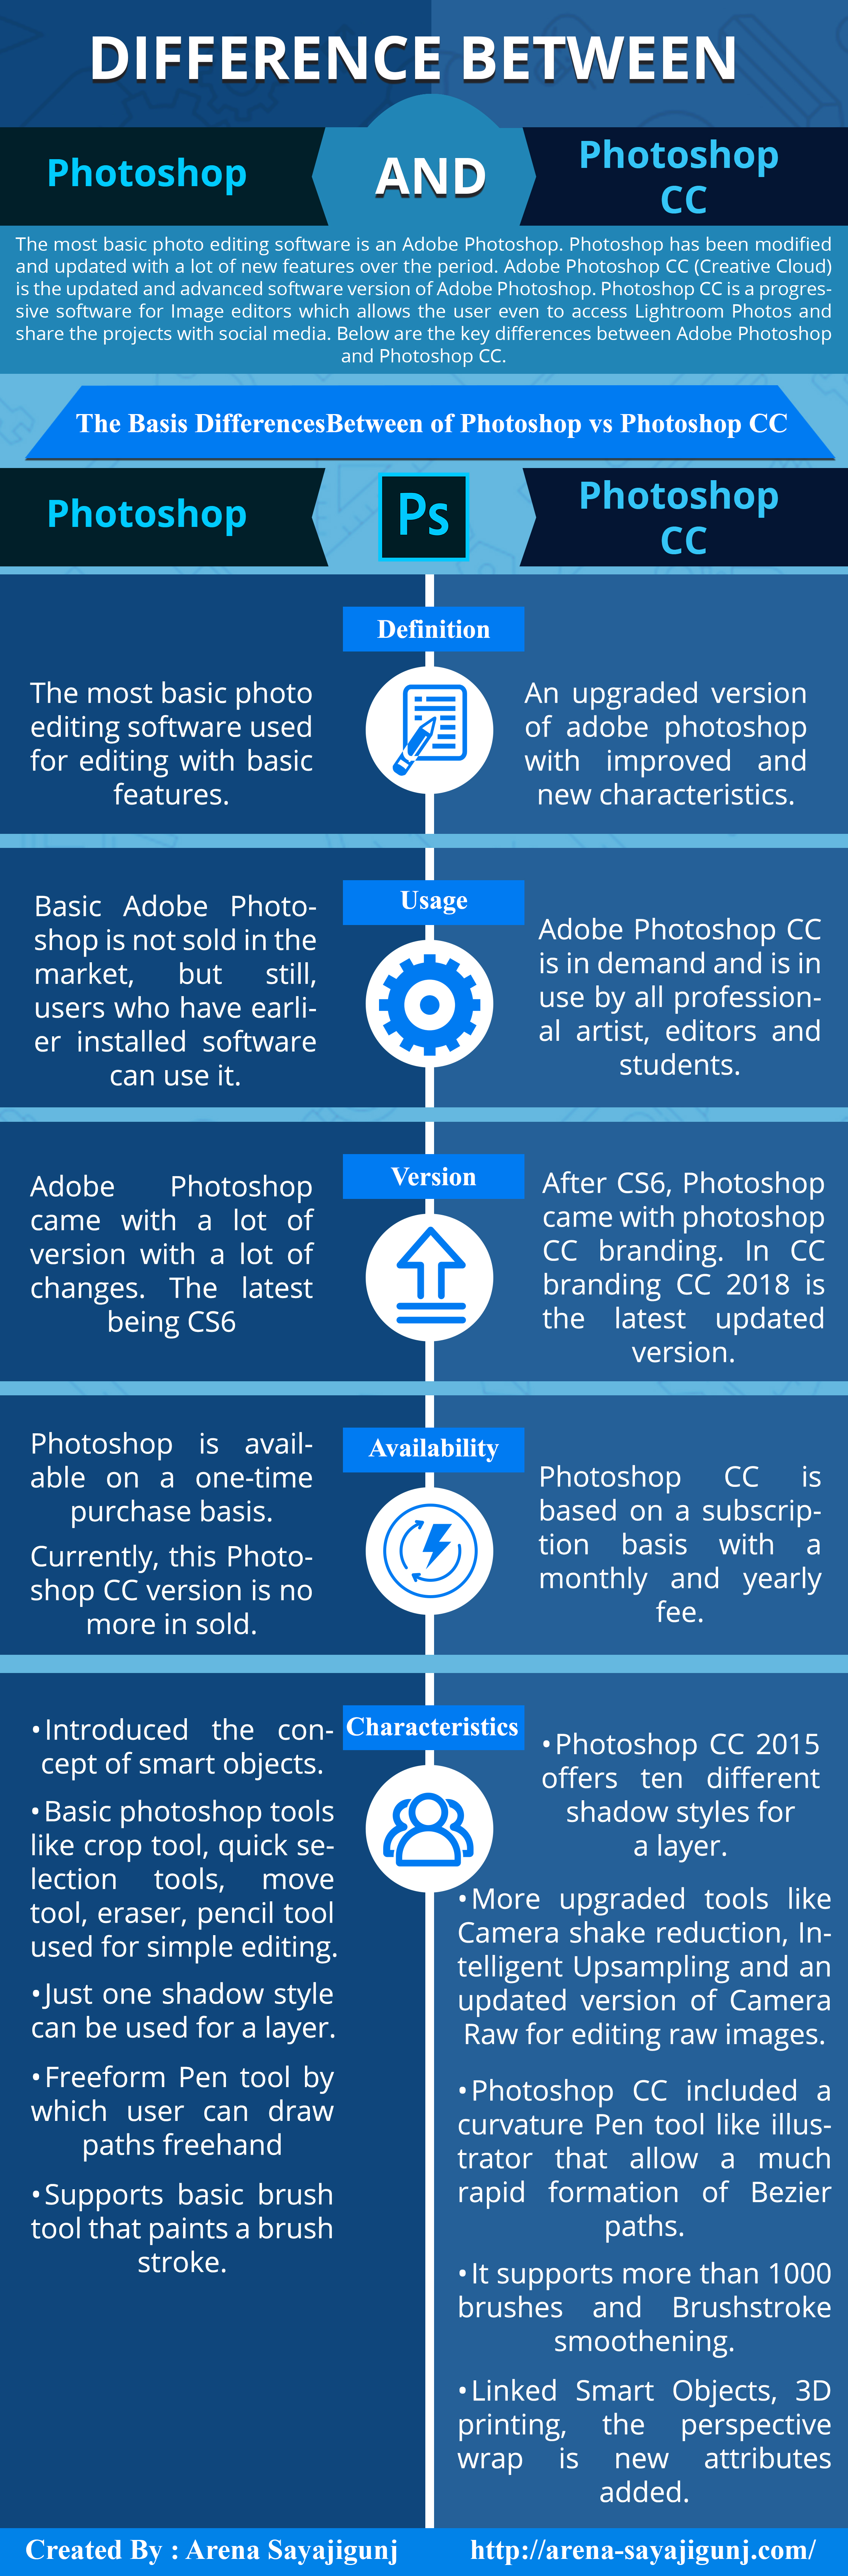
The most basic photo editing software is an Adobe Photoshop. Photoshop has been modified and updated with a lot of new features over the period. Adobe Photoshop CC (Creative Cloud) is the updated and advanced software version of Adobe Photoshop. Photoshop CC is progressive software for Image editors which allow the user even to access Light room Photos and share the projects with social media. Below are the key differences between Adobe Photoshop and Photoshop CC.
Differences Between of Photoshop vs Photoshop CC
Photoshop
Photoshop CC
The most basic photo editing software used for editing with basic features.
Definition
An upgraded version of adobe Photoshop with improved and new characteristics.
Basic Adobe Photoshop is not sold in the market, but still, users who have earlier installed software can use it.
Usage
Adobe Photoshop CC is in demand and is in use by all professional artist, editors and students.
Adobe Photoshop came with a lot of version with a lot of changes. The latest being CS6
Version
After CS6, Photoshop came with Photoshop CC branding. In CC branding CC 2018 is the latest updated version.
Introduced the concept of smart objects.
Basic Photoshop tools like crop tool, quick selection tools, move tool, eraser, and pencil tool used for simple editing.
Just one shadow style can be used for a layer.
Freeform Pen tool by which user can draw paths freehand
Supports basic brush tool that paints a brush stroke.
Characteristics
Photoshop CC 2015 offers ten different shadow styles for a layer.
More upgraded tools like Camera shake reduction, Intelligent Up sampling and an updated version of Camera Raw for editing raw images.
Photoshop CC included a curvature Pen tool like illustrator that allows a much rapid formation of Bezier paths.
It supports more than 1000 brushes and Brushstroke smoothening.
Linked Smart Objects, 3D printing, the perspective wrap is new attributes added.
Photoshop is available on a one-time purchase basis. Currently, this Photoshop CC version is no more in sold.
Availability
Photoshop CC is based on a subscription basis with a monthly and yearly fee.
Arena-Sayajigunj offers an excellent opportunity for students who are interested to learn more on Difference between Adobe Photoshop and Photoshop CC on a more professional level, please sign up today for our Animation Courses.
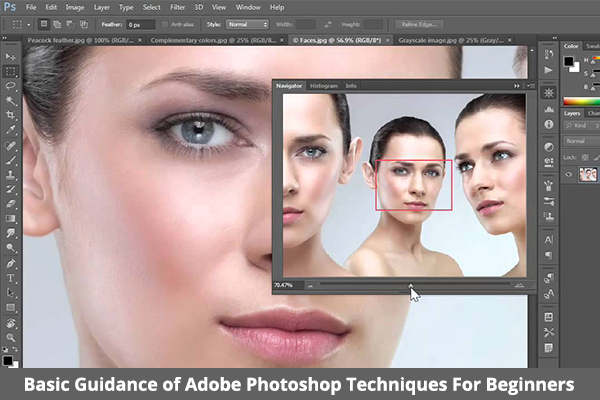
Photoshop is the most powerful photo editing adobe software and good choice for animators and designers, having a great variety of tool to create astonishing graphics and making the image look amazing. This blog post trains you the basic photoshop techniques for learners. If you are beginner then its take time and guidance to even learn the basics photoshop techniques. Below we introduce you to the photoshop work area and shows you how to open and save your images, zoom in and zoom out, and undo the mistakes.
Click on below Video: Basics of Photoshop
Learn the Basics of Photoshop Techniques
1. Open images – To open and create images
In the menu bar, Select File > Open – to open existing images.
In the menu bar, Select File > New – to create a new image from scratch. Select a document preset. Customize the preset by typing in the values like height and width.
2. Get familiar with the Work Area – The Interface
1. Menu Bar
Display the File, Image, Edit and other menus that give you access to a variety of commands, panels and adjustments.
2. Options Bar – Under the Menu Bar
Shows the options for the tool you are currently working with.
3. Tools Panel – Left Side
Contains tools for creating artwork and images editing. Similar tools are classified together. You can access similar tools in a group by clicking and holding a tool in the panel.
4. Panels – Right Side
Include Layers, Color, Properties and other panels that contain a variety of controls for working with images. You can find the complete list of panels under the window menu.
5. Document Window – Middle Side
Displays the file you are currently operating on. Multiple open documents display in tabs in the Document window.
Close the Image: Choose File > Close.
3. Learn How to Zoom and Pan
Change the view of an image – To zoom in and Zoom out and pan around
1. The Zoom tool is placed in the Tools panel. Change from Zoom Into Out in the options bar.
2. The Hand tool also placed in the Tools panel, allows you to pan around a large or zoomed-in image.
4. Undo a Command
Undo single step or multiple steps and use the History panel.
1. To undo the last work you did, Select Edit > Undo or press Control+Z (Windows) or Command+Z (macOS).
2. To redo the previous action you did, select Edit > Redo or again press Control+Z (Windows) or Command+Z (macOS).
To undo multiple times, Select edit > Step backwards multiple times or choose an action in the history panel.
Click on below Video: 10 Things Photoshop Beginners want to Know
5. Save Work
Use the Save commands – To save an image
Choose File > Save As.
Saving in Photoshop format (.psd) retain layers, type and other editable Photoshop properties. It’s best to save the image in PSD format.
Saving in PNG (.png) or JPEG (.jpg) format will save as a standard image file that can be opened, shared by other programs and posted online. When you are finished with editing, save a copy in one of these formats too.
For students who are interested to learn more onbasic of photoshop techniques in vadodara and would like to experience and practice on a more professional level, please sign up today for our Arena Sayajigunj Animation Courses.