If you are a beginner and want to learn in-depth about head modelling animation, then you visited at the right place. This Arena Sayajigunj blog is specially designed for you here you will be going to learn about different types of character head modelling animation and all other things that you should put in your mind while working to create a realistic character head modelling. Creating believable character modelling has been one of the ultimate goals of many 3D artists. So let get started with one-by-one type of head modelling for animation in detail.
Click on below Video: Head Modelling for Animation
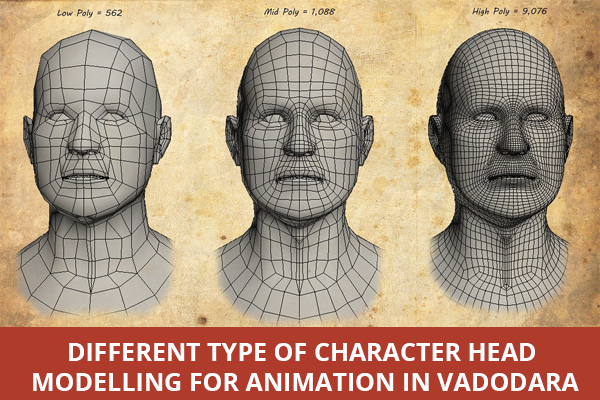
Different Type of Character Head Modelling for Animation for Beginners
1. Pre-Modelling
In the first step of process select a good quality reference photograph because in bad quality reference photographs you may face many problems in the modelling process.
There can be a possibility that your model perfectly looks in orthographic view, but in perspective view, it doesn’t look like a character in reference.
It is essential to take the reference photo of a character at the right angle or else you will waste your time in adjusting the mesh to make it look perfect.
You have to take care of your camera’s focal length, the longer the focal length is, the more superior reference photographs you get.
The model gets thicker than the reference, but you can always set it in the perspective view.
Before importing the reference photograph in a 3D application, you have to make sure that your image fit with each other.
If you need correct reference images in Photoshop or any other image editing software, next, you should take care of lighting so that you can avoid losing details.
2. Edge Planning and Topology
Planning the topology before modelling is essential or else you will get lost in the maze of edge loops or lost control of the poly-count and end up wasting poly on unnecessary parts.
First sketch the main shape of the head part then the base part. In 3D modelling, a good flow of topology is one of the key elements, especially in head modelling and human face.
Due to poor topology and skinning, the polygonal shape can turn to be bad.
With a messed up topology, the head model cannot do a single facial animation and even if it can the expression will look un-natural and distorted badly or it requires a lot of skinning/deform rigging work.
During the animation, the head modelling has more screen time with many close-up shots that involve complex animation facial expression like smile, anger, sad etc. all bring up a different type of shapes and deformations stages of the face.
A good topology creates a decent result with less poly count and smart topology helps in head modelling to be able to deform well into to any realistic expression.
The shape of the head, wrinkles and expressions that are produced by muscles and the shape of the skull and muscles that are produced by the ‘smile lines’. An artist should study the movement and shape of the outside skin, not the muscle. So the topology should be on the major wrinkles which are formed by facial muscles.
Character head modelling starts with the most identical wrinkles then building up intersected edge flows from that. As most of the human face are about 99% similar to each other in anatomy, so the topology would not change dramatically.
3. Modelling Rules
Keep Poly-count low. Make use of four sides as much as possible and use triangle when it is needed, triangles help to save unnecessary edge loop and faces.
Stay away from using more than four sides or poles. You may use poles in an area that is less seen in the model.
The Polygon should always be in square shape, no long thin nor diamond shaped.
The extreme bad case on topology is working at 45 degrees and the edge direction should not work across the curvature line of surfaces.
4. Polygon Modelling
It is the basic and straight forward modelling process.
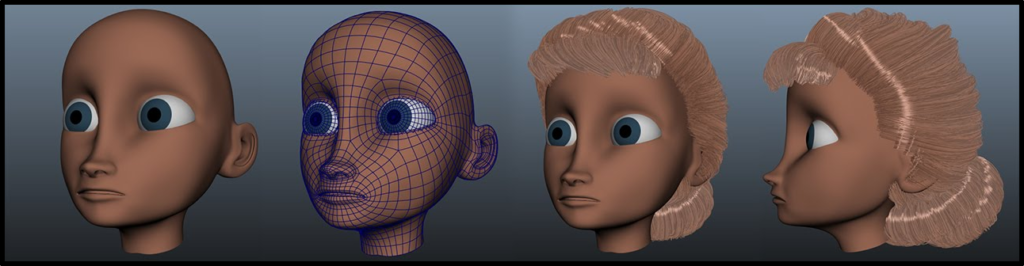
Start creating a character face from shapes like sphere, cube or plane. First, cover out the overall shape of the head and delete unnecessary face and edge loop to make a basic topology and then work into fine detail by joining more edge and face around the area like nose, eye, mouth, ear etc.
Polygon modelling allows you to have direct control over faces, edges and vertices. It requires a lot of editing work and sometimes does not work efficiently with surfaces that need high accuracy. Some of the artists prefer to draw curves that run along the prominent lines of the reference images and then edit the lines to form a head shape.
Then eject around the lines and start forming separated parts of the face and then connect it together, continue adjusting the object until you get a completed face form.
5. Sub-D Modelling
This method is similar to Polygon Modelling.
After having the necessary head model, now you can go into detail by sub-dividing one more level to have more vertex for editing.
This method helps you to adjust the overall shape of the object by editing at the lowest level of the mesh or object.
6. ZBrush/Mudbox Sculpting Software
This Software can be used for model character head modelling, beginning from a zsphere or any head model and then continue with details.
After the detailing, retopology tool can be used in Zbrush or resurface it with the new topology in 3Ds Max software to create a lower poly count model but still keeping the similar look of high resolution model.
The advantage of this method is that you can detail the head model up to millions of polygon and the job of modelling and topology is separated.
To create a 3D realistic face, you need to work on a successful model face from the start.
Click on below Video: Introduction to Character Modeling in Blender
Hope you enjoy the ideas and to learn more about character head modelling in Vadodara and would like to experience and practice on a more professional level, please sign up today for our Arena SayajigunjAnimation Courses.
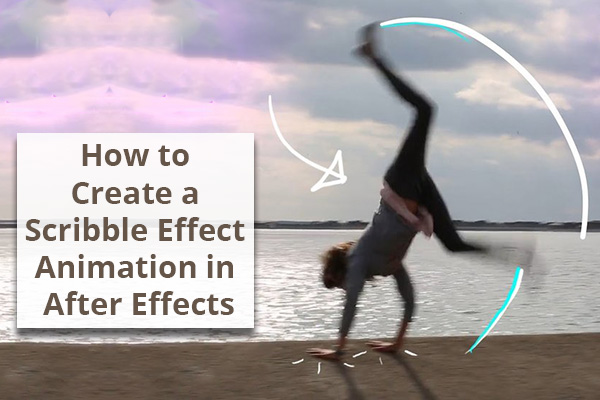
The Scribble effect is a simple animation that can be done in Premiere Pro or After Effects Software. Different software shows a different look and workflow. The animated scribble effect technique is a perfect example of an easy way to create dynamic and handmade graphic elements. In this Arena blogs post, we are going to take a look on a few simple steps to create a scribble effect animation in after effect software and you can add eye-catching graphics to your video.
Click on below Video: Animated Scribble Effect in After Effects 2018-2019
3 Steps to Create a Scribble Effect Animation in After Effects
Step 1: Arrange the Workspace
First, add some cartoonish flames that will come off the back of a race car. After that add the flames using the brush tool, which you can find it in the tools panel or by using the CMD (Mac) or CTRL (PC) + B Keyword shortcut.
This brush tool only works on the layer panel by double-clicking on the layer – You can’t click directly on the composition panel.
Click on below Video: Brush Tools in After Effect
Step 2: Prepare the Brush
Select the brush tool, both the paint and brush panels will become visible. These both panels offer a variety of options. The paint panel allows you to change the opacity, diameter, flow, color, blend mode and duration. Clicking on diameter button will bring you to the brushes panel, where you can specify the diameter, roundness, hardness, angle and spacing of brush. Even you can save the brush settings for future use.
One of the most important properties is the duration section of paint panel. This is a fast-moving clip, to animate flames as quickly and frenetically as possible. Due to this reason, you have to change the duration to “Single Frame.” If you want something a bit more subdued or clunky, then change the duration to “Custom” and then manually type in whatever frame rate you want. With both the workspace and brush ready, now it’s time to use the scribble effect animation inside adobe after effect.
Step 3: Scribble Effect Animation
To start Scribble Effect animation lets bring playhead to the first frame of the clip in the timeline. Using the brush tool directly on the layer panel, draw flames on the first frame. It’s not as simple as drawing the same flames for every frame. This particular clip is two seconds in length, shot at 25 fps, so if you want flames throughout the entire clip, then you need to draw these same flames 50 times. If you are going to create an animation that changes over time, it’s imperative to know the length of a clip so you can make subtle changes.
Knowing a few shortcuts will save your lots of time when creating a frame-by-frame animation. To quickly navigate by individual frames in After Effects, use the Page Up/Down keys. To resize the diameter of the brush, hold the Command (Mac) or Control (PC) key while you click and drag up or down.
Click on below video: Animated Music Video Scribble Effect in After Effects!
General Tips to Spice Up Scribble Animation
Trace an object.
Break up the lines. Have a smaller line or a dot follow a bigger line.
Draw an object that interacts/reacts with your footage.
For students who are interested to learn more on scribble animation in after effect and would like to experience more on a professional level, please sign up today for our Animation Course in Vadodara.
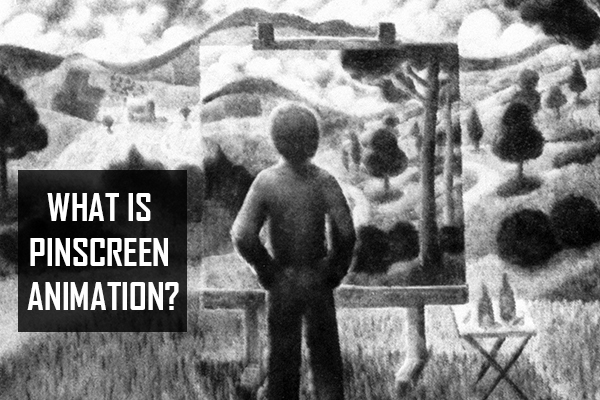
Pinscreen animation makes use of a screen which is entirely filled with moveable pins and can be moved in or out by pushing an object to appear on the screen. The screen is lit from the front side so that the pins cast shadows. To create animated films the pinscreen animation technique has been used with a range of textural effects challenging to achieve with any other animation technique which including traditional cel animation.
Pinscreen Device
A pinscreen is a white screen drilled with thousands of pins in small holes. Light shines from the one side of the screen causing each pin to cast a shadow. Each pin moves in and out through the holes can cast different shadows.
These pins do not move easily they presenting some resistance to movement to avoid unintended dislocation and thus image error. The pins motion resistance depends on the pinscreen calibration.
The white screen becomes darker the farther the pins are pushed out, pointing from the surface. When more pins are pushed in less shadows are formed the lighter the screen becomes giving a greyish color and ultimately an all-white screen again.
Click on below Video: How to Make a Pin Art Toy
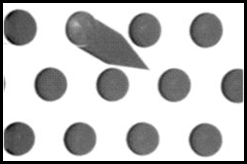
Basis of Image Synthesis
The image creation process in the pinscreen is based on the shadows the pins cast over the white surface board, enabling the synthesis of black and white images with intermediate grey levels. In below images shows an amplified model of a fraction of the pinscreen used to demonstrate the shading process.
Let assume that you are looking at the front surface board. When the pins are not appearing from the surface, no shadows are formed and the surface seems completely white. If one of the pins is pressing from the backside, its shadow will be cast on the white surface board. The further the pin is moved the longer the shadow appears.
Instead of one pin, push a group of pins. Suppose we done it in only half portion. The shadows cast will appear with white spaces between them and a medium grey color will be displayed.
If the pins are entirely pushed, the shadow of each pin will overlay that of its neighbour. No light will reach the white surface board and black color is cast. The back surface shows the reverse effect acting as a negative.
Digital Pinscreen
The Digital Pinscreen was developed between 1989 and 1995 by Pedro Faria Lopes and allowed to reproduce the traditional Pinscreen with gains both in ease of use and productivity. It is possible to simulate the Pinscreen using 3D primitives computer graphics and this approach is not suitable for real-time manipulation of the pins. On a Pinscreen, it is the shadows of the pins that create the image and not the pins themselves. That means there is no need to represent the pins visually, but only the shadows they cast.
Furthermore the shadow can be interpreted as a rectangle with a length equivalent to the height of the pin and rotated in correspondence with the light source. It means that the shadow of a pin has two properties which are length and orientation. As for the light source, assuming the light is far away from the surface (parallel rays), moving it around in a three-dimensional space only has effects in a two-dimensional plane: it only changes the length or orientation of the shadows of the pins, making it easier to change the shadows directly instead of the light source.
By defining a maximum shadow vector (MSV) as the length and orientation of the shadow, a pin cast it if its height is maximum than other pin heights have the same orientation of the MSV and its length proportional to the length of the MVS. Representing the shadows as rectangles and controlling the MSV, allow a fundamental shift in the way the Pinscreen image synthesis can be achieved: visually, it is possible to work only in 2D instead of 3D, which will result in very high gains in terms of interaction, visualization and ultimately, inefficiency that will allow processing of hundreds of thousands of pins in real-time.
Digital Pinscreen Animation
Because of the cost and labour-intensive animation process, many computer programs have been made with the purpose of simulating the images generated by a physical pinscreen.
One of the benefits of using digital pinscreen animation is the recovery of images. With the traditional pinscreen, there is no other way to recover a previous image except for creating it again with no guarantee of accuracy. With digital pinscreen, the previous image can be retrieved and modified without having to be recreated.
For students who are interested to learn more on Digital Pinscreen Animation and would like to experience and practice on a more professional level, please sign up today for Arena Animation Prime Course.
Drawn on film animation is one of the traditional technique of animation. This animation technique needs a lot of talent and precise skill where footage is produced by creating the images directly on film reel without using any cameras. As opposed to any other style of animation use tools, techniques and various methods where the objects or images are photographed frame by frame with an animation camera. This technique skips the entire process of video sequencing, photographing or the more modern process of digital rendering.
Click on Below Video: How to do Animation by Drawing on Film
Learn How Drawn on Film Animation Works?
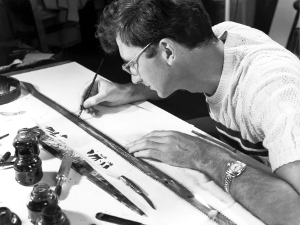
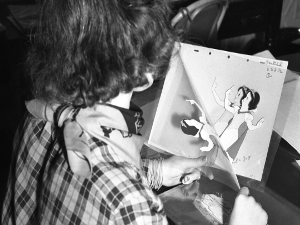
The animators can work either developed (black) or undeveloped (blank) film in small sizes or large sizes; which is the best suitable technique. The film reel is put down across the work surface and fixed into place. After placing the film, the animator works from frame to frame to design image on each small frame, managing reel with every sequential frame to display the motion.
Click on Below Video: Making a Hand Drawn Animated 16mm Film
The major benefit of drawn on film animation is that it is similarly inexpensive. It does not need any complex camera arrays, thousands of cells or expensive software. A few sample images and etching tools, a projector and a roll of film, can be sufficient to let an animator discover their capabilities and play with a complete medium. The simplicity of this animation allows the animator to be more creative and innovative in storytelling through animated images or videos.
Techniques of Drawn on Film Animation
Animators use a blank film reel or used film reel for creating the drawn on film animation technique. A film reel of any size is fixed on to a plain surface and on every small frame, animators create drawings or sequences to show the animation sequence.
Also, blank film reel can be developed in a dark room where the film is not exposed and use a small light, animations can be created by exposing the film little by little. Small objects can be placed on those films while trying to focus the lights on the frames, and this creates a permanent impression of the object. Once the animation is done, it has to be developed like a photograph and viola you see a clearer image. This is more like a stop-motion animation combined with silhouette animation.
Click on Below Video: Hand Drawn Animation vs CGI – A Documentary
Advantage of Drawn on Film Animation
It is Less expensive
No need to spend on expensive software
Perfect drawings or complex drawings are not required
Unique animations can be created
Computer is not mandatory
Animators can play around with different kinds of exposure to create stunning animations.
A roll of film, projector, etching tools and simple drawings is sufficient to create drawn on film animation.
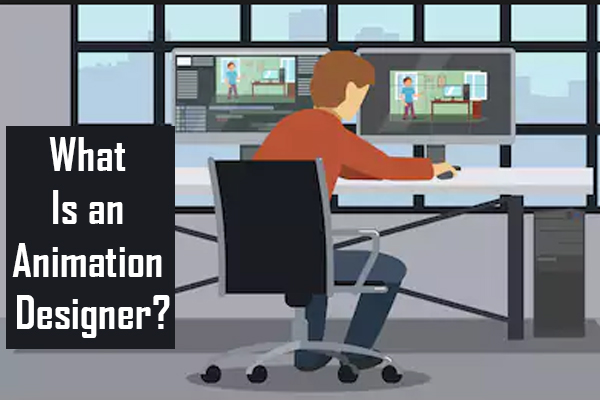
An animation designer utilizes computer technology to create images and effects for movies, television, websites and video games. It also coordinates projects and animators to produce 3D animation.
How to Become an Animation Designer
Animation designers, also referred to as animators, create visual effects and animation featured in video games, movies, and TV shows, as well as on websites. Created from computer software programs, 2D or 3D animations are used to replicate the features and actions of people, animals, places and things to tell a story or advertise a product.
Career of Animation Designer
Careers in animation designer are something that many students are considering in today’s economy. In a similar fashion to web design, graphic design, and other internet related careers, the demand for people has increased with these skills. Animation designers do much more than make cartoons these days, even though this is still an excellent career option. With advances in computer technology, animation designers are now used in many different businesses such as movies, television, marketing and advertising, video games, and website development. So, there is an ample opportunity to find an excellent job in a wide variety of industry with education and training.
List of probable Career Roles in Animation:
2D Animator
3D Animator
Image Editor
Modeller
Texture Artist
Layout Artist
Lighting Artist
Story Board Artist
Background Artist
Clean Up Artist
Rigging Artist
Rendering Artist
Key Frame Animator
Character Animator
Digital Ink and Paint Artist
Click on Below Video: Career in Animation
Common Software that Animation Designers should know include:
If you are considering a career as an animation designer than the following information and facts should provide you with some insight into what you can expect:
The industry trend is to focus on computer-based animation.
Video game industry provides numerous opportunities for animation designers.
Animators are often required to work for additional hours to ensure project deadlines are met.
Most of the animators get their start in drawing and more traditional forms of art.
Most important skills to have to include creativity and innovation, attention to detail, organization, effective communication skills, focus, as well as being able to work in many different working situations.
The overwhelming majority of people that work in the industry have an animation related college diploma.
Common training degrees include Animation Production, Computer Animation, Arts and Design and Computer Visualization.
Most animators get their start by enrolling in an internship program or co-op and then are hired out of school.
Most animators start their career with smaller companies and then move onto larger companies as they gain more experience.
Many people start in graphic design and Web design and then specialize in animation.
Developing an extensive portfolio to showcase skills is a critical factor in getting hired for animation projects.
Click on Below Video: Career in Animation: How to be an Animator?
Animation Designer Salary
Animation Designers salary expectations widely based on experience and the type of animation project that you are working on. On average, an animation designer can expect to make anyplace approximately Rs 349,958 per year. Experience can also lead to more advanced job positions in animation management, which will increase your annual income.
 A pinscreen is a white screen drilled with thousands of pins in small holes. Light shines from the one side of the screen causing each pin to cast a shadow. Each pin moves in and out through the holes can cast different shadows.
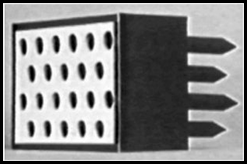
 Instead of one pin, push a group of pins. Suppose we done it in only half portion. The shadows cast will appear with white spaces between them and a medium grey color will be displayed.
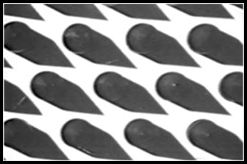 Furthermore the shadow can be interpreted as a rectangle with a length equivalent to the height of the pin and rotated in correspondence with the light source. It means that the shadow of a pin has two properties which are length and orientation. As for the light source, assuming the light is far away from the surface (parallel rays), moving it around in a three-dimensional space only has effects in a two-dimensional plane: it only changes the length or orientation of the shadows of the pins, making it easier to change the shadows directly instead of the light source.
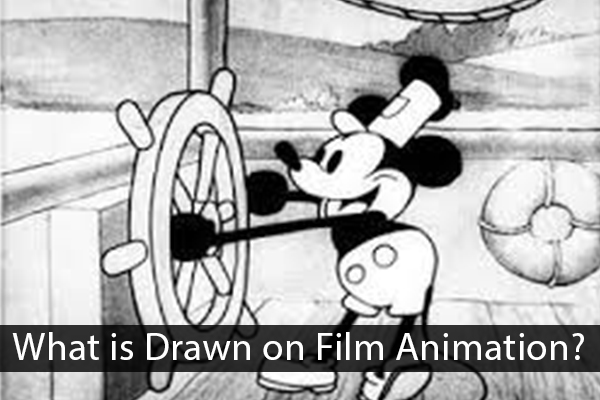
 Techniques of Drawn on Film Animation